A few months ago a friend was gifted three sheep and asked if I would help butcher them in return for half a lamb. I jumped at the opportunity to learn new skills and put some food in the freezer for my family. However, this was not without some trepidation. I grew up on a beef farm where other animals were raised for food as well, but I was never present for the butchering or processing. I've never killed an animal larger than a chipmunk or crow. The only deer I ever got while hunting was an extra one that our group shot. Never skinned an animal. It's not that I have any qualms about animals as food. My experiences with getting that food were simply second and third hand.
My friend and his family have what they call a hobby farm. They work other jobs, but they grow and raise most of their own food on somewhere around two acres. I love my new house and the privacy here, but theirs is a place of great beauty and peace. I love visiting and discussing our respective projects and I've come to enjoy his wisdom and outlook on life. I had been around enough to know that his animals are treated ethically and humanely. So I was fairly certain that the experience wouldn't be too traumatic.
I asked what he did with the hides and was told that he usually doesn't save them. His mother-in-law wanted one but I was welcome to the other two. I hate waste and here was an opportunity to learn basic hide tanning as well. So I took him up on the offer. If you want to learn hide tanning, I highly recommend that you start with something smaller than a sheep. That is a lot of surface area and the hide weighs between 70 and 100 pounds when wet.
 | |
| Salted hide after the first rough fleshing |
The process of fleshing the hide took a couple of hours. The first fleshing removed large chunks of fat and any meat left on the skin. Then I salted it for preservation until I could get back to work on it. The salted hide can be stored for several months if needed. I don't know if this is true of other large animal hides, but a sheep has a membrane with about one millimeter of fat between it that lies tight against the skin. That layer was a royal pain to remove on the first hide (which I hadn't salted and started processing immediately). The salt on the second hide lifted the membrane and made this layer relatively easy to remove.
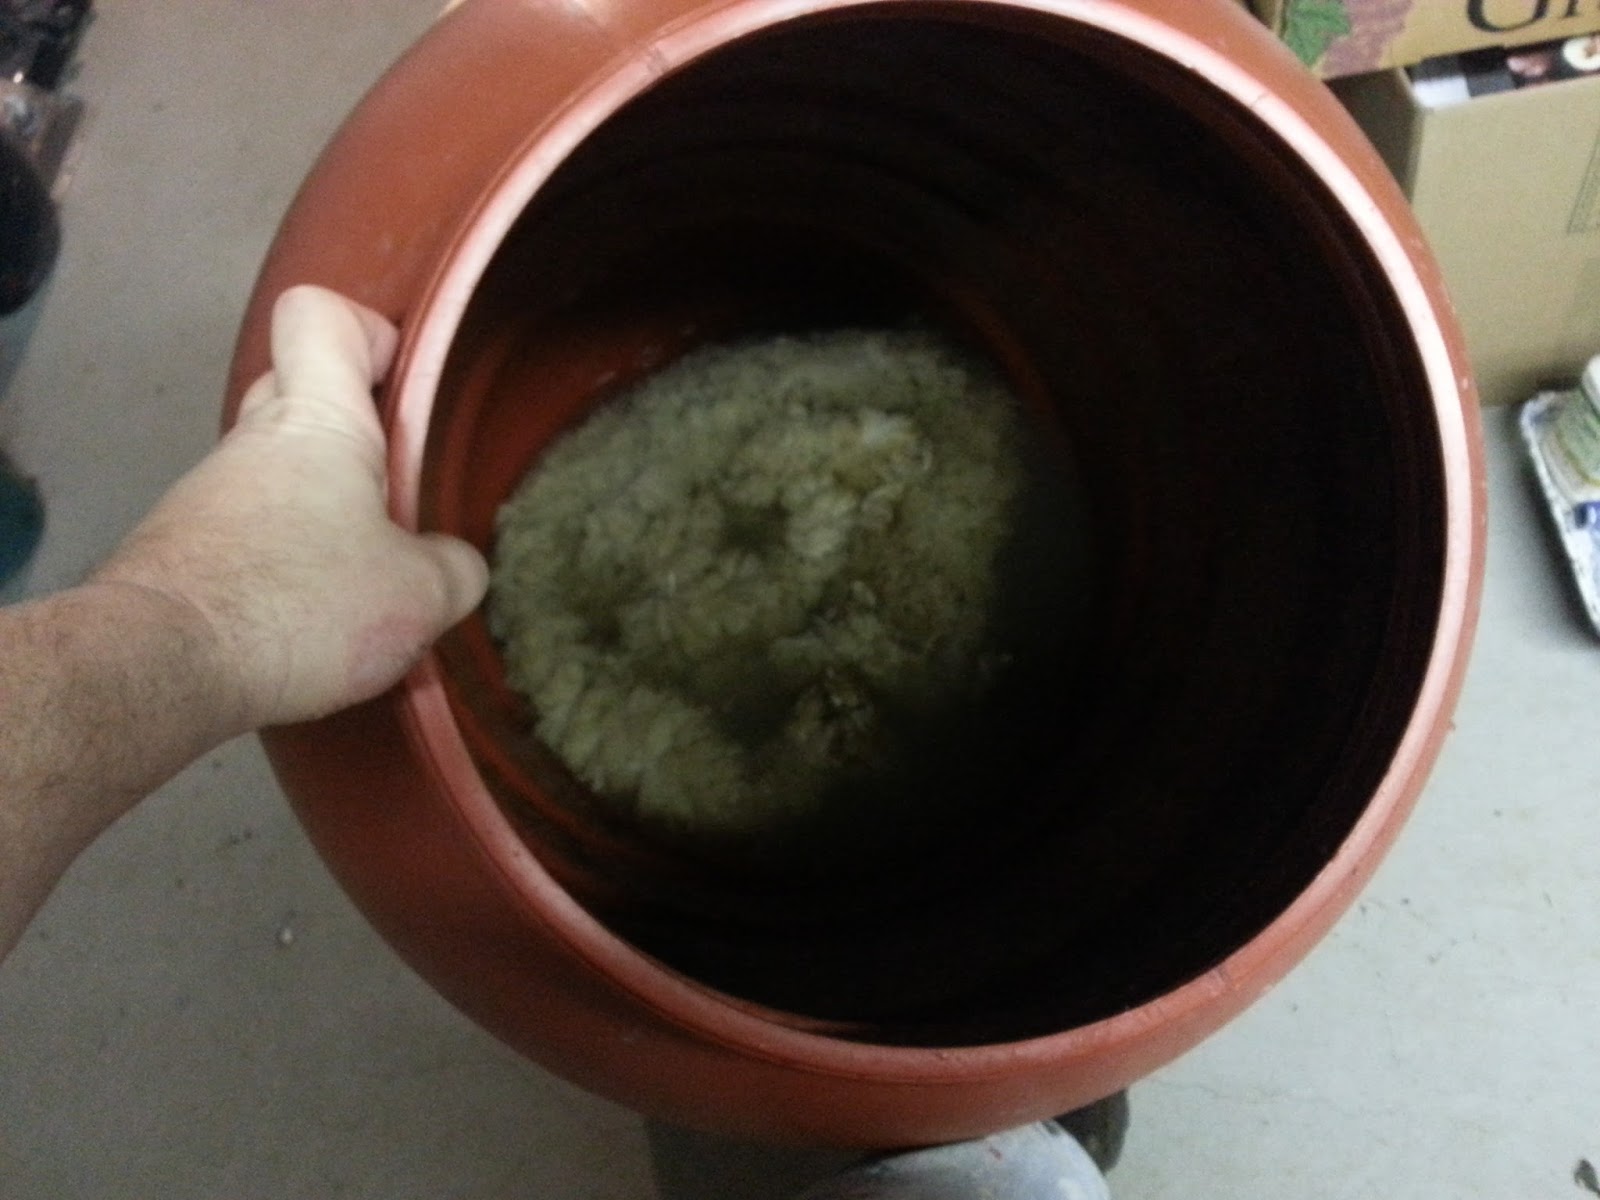 |
| The hide soaking in tanning solution |
I decided to use a salt and alum tanning method. The hide is soaked in the solution and stirred several times a day for a week. The alum tightens the pores and holds the wool in place. If I wanted to remove the wool a solution of lye or wood ash could be used to loosen the pores. Theoretically anyway. I have no empirical knowledge of how it actually works out. When the hide comes out of the solution a final fleshing is done if needed.
 |
| Drying |
Drying takes what feels like forever. In my basement it was a week and that was with a fan and a dehumidifier going almost non-stop. The skin needs to be stretched. Basically the hide is pulled in all directions as hard as you can several times during the drying. I used a rounded board to do some of the final stretching. There are other methods where the skin is laced to a frame, but I decided to go as low tech as I could. There are a couple of lubrication steps involved during and after drying. these help preserve and keep the skin supple.
 |
| Fluffy hide |
Sheep really aren't careful animals when wandering around their pen. These sheep look like they had slept in the Spanish needles. That was actually the worst part of the job. Pulling out the burrs and combing out the individual needles took about 4 hours.
The second byproduct of the deconstruction was the fat. These animals had a thick layer of winter fat on them at the time of butchering. After fleshing the first hide I had a bucket that rendered down into 4 pounds of fat.
 |
| Fat cut into chunks |
 |
| Rendering |
 |
| Liquid fat |
 |
| Weighed and labeled for storage |
Here's a pro tip. If you're rendering fat for more than an hour, do it in a turkey fryer outside. Between the one hide and half a lamb I ended up with about 20 pounds of rendered fat. That took about 4 hours all told and my kitchen still smells like hot sheep fat. My wife hates me.
So what does one do with all that fat?
 |
| Soap loaf |
 |
| De-molded soap |
 |
| Cutting the soap a bit too early |
One makes soap. I also plan to save some to mix with beeswax for candles. Any soap that is old or doesn't turn out quite right can be milled, melted and made into new soap. So, of course, I had to experiment with that. The results weren't the greatest, but I got some experience.
 |
| Milled soap which means grated with a cheese grater |
 |
| Melted soap glop |
 |
| Milled soap de-molded |
The best part of the deconstruction, however, was learning to butcher the animal and process it into cuts for eating. Again, the results weren't the greatest. I stopped at primals. So I have racko and lego lamb in the freezer. The loin came out pretty cleanly so there is a nice roast and some medallions. The larger scraps were cut into chunks for stew and the smaller scraps are now lamburger.
The final step was to boil the bones into broth. The meat scraps fro this were creamed and eaten for breakfast. Lamb shit on a shingle, anyone?
 |
| Neck and spine |
 |
| Best brunch ever! |
This sheep deconstruction was definitely an interesting series of experiences. It raised a few moral and ethical questions for me to answer. This was one of the best learning and introspection experiences I've had in a long time. At times it challenged my resolve, but I now know that if I need to skin and process an animal for food and other resources I can. Maybe not well, yet, but passably.